
Product Overview
The Mainstays Side Storage Desk is a versatile‚ functional solution for students and small spaces‚ offering a spacious work surface and convenient side shelving for organization. Its rustic or industrial design blends seamlessly into various room aesthetics‚ making it ideal for home offices or study areas. The desk is known for its durability and ease of assembly‚ providing a practical workspace with added storage capabilities.
1.1 Features and Benefits of the Mainstays Side Storage Desk

The Mainstays Side Storage Desk offers a spacious work surface and convenient side shelving for organized storage‚ perfect for textbooks‚ notebooks‚ and office supplies. Its rustic or industrial aesthetic adds style to any room‚ while its sturdy construction ensures durability. Designed for students‚ home offices‚ and small spaces‚ this desk provides a practical workspace with added storage capabilities. The desk is easy to assemble and holds up to 50 lbs on the desktop‚ with each shelf supporting 15 lbs. Its compact design makes it ideal for bedrooms‚ dorm rooms‚ or home offices without taking up too much space.
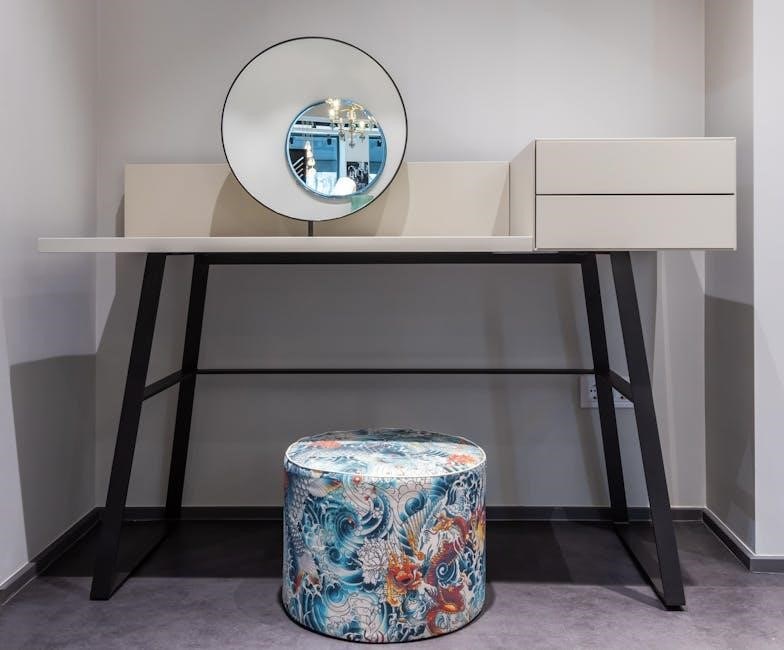
1.2 Design and Aesthetic of the Desk
The Mainstays Side Storage Desk features a sleek‚ modern design with a rustic or industrial aesthetic‚ making it a versatile addition to any room. Its compact footprint ensures it fits seamlessly into small spaces‚ such as dorm rooms or home offices‚ while maintaining a stylish appearance. The desk’s design includes clean lines‚ neutral tones‚ and metal accents‚ blending functionality with timeless appeal. Its side shelving adds a practical yet visually pleasing element‚ enhancing both storage and visual balance. This design ensures the desk is both functional and visually appealing‚ making it a great choice for modern interiors.
1.3 Weight Capacity and Durability
The Mainstays Side Storage Desk is built to last‚ with a sturdy construction that supports a weight capacity of up to 50 lbs on the desktop and 15 lbs on each shelf. Made from durable materials like engineered wood and metal accents‚ it ensures long-lasting performance. Regular maintenance‚ such as cleaning with a soft cloth and avoiding harsh chemicals‚ helps preserve its finish. While robust‚ it’s essential to handle with care to maintain its structural integrity and avoid damage from over-tightening or improper lifting.
1.4 Target Audience: Students‚ Home Offices‚ and Small Spaces
The Mainstays Side Storage Desk is designed for students‚ home offices‚ and small spaces‚ offering a compact yet functional workspace. Its side shelving provides organized storage for textbooks‚ notebooks‚ and office supplies‚ making it ideal for academic or professional tasks. The desk’s space-saving design fits seamlessly into bedrooms‚ dorm rooms‚ or home offices‚ ensuring efficiency without compromising on style or functionality. It’s a practical solution for anyone needing a dedicated workspace in limited areas‚ catering to both productivity and convenience.

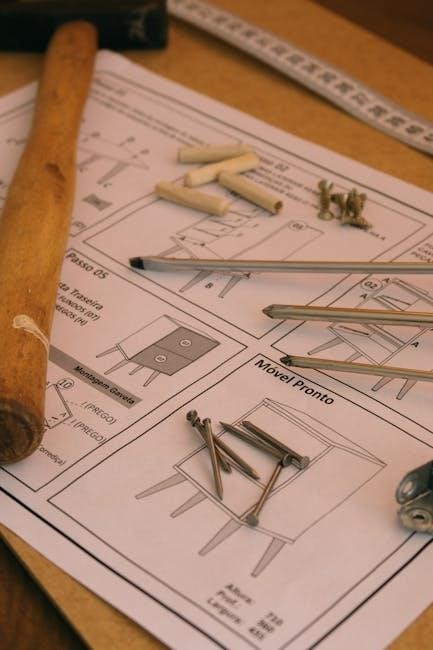
Understanding the Assembly Process
Assembly of the Mainstays Side Storage Desk requires careful attention to the provided instructions. It involves organizing parts‚ following step-by-step guidance‚ and using essential tools efficiently.
2.1 Importance of Following Assembly Instructions
Following the assembly instructions for the Mainstays Side Storage Desk is crucial for ensuring stability‚ safety‚ and functionality. Proper assembly prevents structural issues‚ avoids damage to components‚ and guarantees the product performs as intended. Misaligned parts or incorrect tightening can lead to instability‚ potentially causing the desk to wobble or collapse. By adhering to the guide‚ users can maximize the desk’s weight capacity and prolong its lifespan. Additionally‚ correct assembly ensures all features‚ such as storage shelves‚ function optimally‚ providing a practical and efficient workspace.
2.2 Tools and Materials Required for Assembly
The Mainstays Side Storage Desk assembly requires specific tools to ensure a smooth and successful process. A screwdriver‚ preferably a Phillips head‚ is essential for securing screws. Allen wrenches may also be needed for certain bolts. Additionally‚ a rubber mallet can help in gently tapping parts into place without causing damage. Ensure all components‚ such as shelves‚ frames‚ and hardware‚ are included in the package. Having a clean‚ level work surface is crucial for proper alignment. Organize parts beforehand to avoid confusion and streamline the assembly process.
2.3 Recommended Assembly Environment
For a successful and stress-free assembly of the Mainstays Side Storage Desk‚ choose a spacious‚ clean‚ and level work area. Avoid hard or abrasive surfaces that might damage the desk components. Ensure the floor is even to prevent wobbling during assembly. Good lighting is essential to clearly see instructions and parts. Keep all tools and components within easy reach to maintain efficiency. Avoid assembling on carpets or uneven surfaces‚ as they can hinder proper alignment. Open the package in the room where the desk will be placed to minimize heavy lifting and potential damage during movement.

Unpacking and Preparation
The Mainstays Side Storage Desk requires careful unpacking‚ ensuring all components are removed and identified. Check for damage and verify all parts are included before starting assembly.
3.1 Steps to Unpack the Desk Components
Begin by carefully opening the box and removing all packaging materials. Gently lift out the desk components‚ ensuring no parts are damaged during unpacking. Check for any visible damage or dents on the pieces. Retain all packaging materials for future use or return purposes. Organize the components in a spacious‚ clean area to avoid clutter. Identify and sort the parts according to the assembly manual‚ ensuring all items are accounted for before proceeding. This systematic approach ensures a smooth and efficient assembly process. Always handle components with care to prevent accidental damage.
3.2 Identifying and Sorting the Parts
After unpacking‚ carefully identify each component using the assembly manual’s parts list. Separate the desk frame‚ shelves‚ hardware‚ and accessories into distinct groups. Label or mark each part to ensure easy recognition during assembly. This step prevents confusion and saves time. Organize smaller hardware‚ like screws and bolts‚ in containers to avoid misplacement. Verify that all listed items are present and undamaged. Sorting the parts methodically ensures a seamless assembly process and helps in quickly locating each piece when needed. Proper identification and organization are crucial for efficient assembly.
3.3 Checking for Damage or Missing Components
Before starting assembly‚ thoroughly inspect all components for any visible damage or defects. Check for scratches‚ dents‚ or broken parts. Compare the contents with the manual’s inventory list to ensure no items are missing. If any components are damaged or missing‚ contact customer support immediately. Addressing these issues early prevents delays during assembly. Carefully examine hardware‚ shelves‚ and the desk frame for any signs of wear. This step ensures that all parts are in good condition and ready for assembly. Proper inspection helps avoid potential issues and ensures a smooth assembly process.

Safety Precautions
Always follow general safety guidelines to avoid injuries. Wear protective gear and ensure the area is clear. Avoid over-tightening parts‚ as this may cause damage.
Use proper lifting techniques to prevent strain. Keep children away during assembly. Handle sharp edges and heavy components with care to ensure a safe assembly process.
4.1 General Safety Guidelines
Read the assembly instructions thoroughly before starting. Always work in a clean‚ spacious area to avoid tripping hazards. Wear safety gloves and goggles for protection.
Ensure all parts are properly aligned before tightening. Keep children and pets away during assembly to prevent accidents. Avoid over-tightening‚ as this may damage the product. Use proper lifting techniques to prevent injury. Ensure the desk is stable and level before use. Follow all safety precautions to ensure a successful and injury-free assembly process.
4.2 Avoiding Over-Tightening and Damage
Avoid over-tightening screws or bolts‚ as this may damage the desk’s components or strip the threads. Use the recommended tools and apply gentle‚ consistent pressure.
Inspect all parts before assembly to ensure they fit properly. If a part feels misaligned‚ do not force it. Instead‚ reposition it carefully.
Use a soft‚ dry cloth to clean surfaces and avoid abrasive cleaners that could scratch the finish.
Over-tightening can lead to warping or instability‚ so tighten screws just until snug.
Handle all parts with care to prevent accidental damage during assembly.
4.3 Lifting and Handling Instructions
Always lift the desk and its components with care to avoid damage or personal injury.
Two people are recommended for lifting heavier parts to ensure stability and balance.
Bend at the knees and lift with your legs‚ not your back‚ to maintain proper lifting technique.
Hold the desk firmly by its sturdiest parts‚ avoiding fragile edges or shelves.
Never lift the desk by its shelves or drawers‚ as this may cause structural damage.
Place the desk on a soft‚ clean surface to prevent scratching during assembly.
Handle all parts gently to avoid accidental dents or breaks.

Step-by-Step Assembly Instructions
Begin by unpacking and identifying all components. Follow the manual’s step-by-step guide to assemble the frame‚ attach shelves‚ and secure the desktop. Use provided tools carefully‚ ensuring all parts align properly. Tighten screws firmly but avoid over-tightening. Double-check connections for stability before final use. The process is straightforward when following the instructions methodically.
5.1 Assembling the Desk Frame
Begin by unpacking the desk frame components‚ including the legs‚ side panels‚ and crossbars. Attach the legs to the side panels using the provided screws‚ ensuring they align with pre-drilled holes. Tighten firmly but avoid over-tightening. Next‚ connect the side panels to the desktop frame using the bolts and washers. Ensure all connections are secure and the frame is level. Use a rubber mallet to tap pieces into place gently. Finally‚ attach the crossbars to the frame for added stability. Double-check all hardware before proceeding to ensure a sturdy foundation for the desktop and shelves.
5.2 Attaching the Shelves and Storage Units
Once the desk frame is assembled‚ identify the shelves and storage units from the unpacked components. Align the shelves with the pre-drilled holes on the frame‚ ensuring proper fitment. Secure the shelves using the provided screws‚ tightening them firmly but avoiding over-tightening. Repeat the process for any additional storage compartments or drawers. Double-check that all shelves are level and evenly spaced. Handle each shelf carefully to prevent scratching or misalignment. Ensure all storage units are securely attached before moving on to the next step.
5.3 Securing the Desktop Surface
Place the desktop surface onto the assembled frame‚ ensuring it aligns perfectly with the pre-drilled holes. Use the provided screws to secure the desktop‚ starting from the center and working outward to avoid warping. Tighten each screw firmly but avoid over-tightening‚ which could damage the surface. Once the desktop is securely attached‚ double-check its alignment and stability. Ensure the surface is flush with the frame and evenly supported. If necessary‚ adjust the frame slightly to achieve proper leveling. Finally‚ verify that all screws are tightened evenly to complete the installation.
5.4 Final Tightening and Adjustments
Once all components are assembled‚ perform a final check of all connections and screws. Ensure every bolt and screw is tightened securely but avoid over-tightening‚ which may damage the material. Double-check the desktop alignment and shelf positioning for proper leveling. If necessary‚ make minor adjustments to ensure the desk is stable and even. Verify that all storage units and shelves are securely attached and functioning as intended. Finally‚ inspect the entire structure for any gaps or misalignments and address them before use. This step ensures the desk is safe‚ stable‚ and ready for daily use.

Troubleshooting Common Issues
Identify and address common assembly issues like wobbling or misaligned parts. Check for loose bolts‚ ensure proper alignment‚ and consult the manual for solutions. If issues persist‚ contact customer support for assistance.
6.1 Common Assembly Mistakes and Solutions
One common mistake during assembly is over-tightening screws‚ which can damage the material. To avoid this‚ use a screwdriver with careful force. Another issue is misaligning parts‚ such as shelves or legs. Ensure all components are properly aligned before securing them. If the desk wobbles‚ check if all legs are evenly tightened and the surface is level. If parts seem loose‚ double-check connections without over-tightening. Always refer to the manual for correct torque and alignment guidelines to prevent structural instability;
6.2 Addressing Wobbling or Instability
If the desk wobbles‚ first ensure all legs are evenly tightened and the surface is level. Place the desk on a flat‚ stable floor to prevent imbalance. Check if all bolts and screws are securely fastened but not over-tightened. If instability persists‚ inspect for any missing or loose connections‚ especially around the frame and shelves. Adjust the legs to equalize weight distribution. For added stability‚ consider using rubber floor pads under the legs to enhance grip and balance. Ensure all parts are correctly aligned as per the manual to maintain structural integrity and prevent further issues.

6.3 Dealing with Missing or Damaged Parts
If you find any parts missing or damaged during assembly‚ immediately stop and contact customer support for assistance. Do not proceed‚ as this could lead to structural issues. Refer to the provided parts list in the manual to identify and confirm missing items. For damaged components‚ request replacements promptly. Keep the original packaging and all components intact when filing a claim. Most manufacturers‚ including Mainstays‚ offer support for such cases‚ ensuring you receive the necessary parts to complete your desk assembly successfully.
Maintenance and Care
Regular cleaning with a soft cloth and mild cleaning solutions is essential. Avoid harsh chemicals to prevent scratches. Periodic inspections ensure stability and safety.
7.1 Cleaning the Desk Surfaces
To maintain the Mainstays Side Storage Desk‚ clean its surfaces regularly with a soft‚ dry cloth. For tougher stains‚ use a mild cleaning solution applied to the cloth‚ not directly to the desk. Avoid abrasive cleaners or harsh chemicals‚ as they may scratch or damage the finish. Wipe in the direction of the grain for wood surfaces. For metal or plastic parts‚ a damp cloth is sufficient. Avoid excessive moisture‚ which could harm the materials. Regular cleaning prevents dust buildup and maintains the desk’s aesthetic appeal. Always test a small‚ inconspicuous area first to ensure the cleaning product doesn’t cause discoloration.
7.2 Preventing Scratches and Damage
To prevent scratches and damage on the Mainstays Side Storage Desk‚ use felt pads or soft cloth under heavy objects placed on the surface. Avoid placing sharp or abrasive items directly on the desk. Never use harsh chemicals‚ abrasive cleaners‚ or rough scrubbers‚ as they can damage the finish. For metal or plastic parts‚ avoid excessive force or bending. Place items carefully to prevent accidental impacts. Regularly inspect the desk for signs of wear and address them promptly. Use coasters or mats for liquids to prevent spills from damaging the surface. Protecting the desk ensures long-lasting durability and maintains its appearance.
7.3 Regular Inspection and Maintenance
Regularly inspect the Mainstays Side Storage Desk for signs of wear or damage. Check the shelves and storage units to ensure they are evenly loaded and within the recommended weight limits. Tighten any loose bolts or screws to maintain stability. Clean dust and debris from crevices to prevent damage. Inspect the desktop and shelves for scratches or dents and address them promptly. For metal parts‚ ensure there is no rust or corrosion. Lubricate moving parts if necessary. Regular maintenance ensures the desk remains sturdy‚ functional‚ and visually appealing over time. Address any issues early to prevent further damage.
Additional Resources
Access the official assembly manual for the Mainstays Side Storage Desk online. Utilize PDF guides and video tutorials for clarity. Contact customer support for assistance or missing parts.
8.1 Accessing the Official Assembly Manual
The official assembly manual for the Mainstays Side Storage Desk is available for free download as a PDF from official sources. Visit the manufacturer’s website or platforms like ManualsLib or All-Guides Box to access the guide. The manual provides detailed‚ step-by-step instructions for assembling the desk‚ including diagrams and essential safety tips. It also covers troubleshooting common issues and maintenance advice. Ensure to download the correct version (e.g.‚ Dorel Home 8104885WC) for accuracy. The PDF is typically 1.95 MB‚ making it easy to download and print for reference during assembly.
8.2 Online Tutorials and Videos
For a visual guide‚ online tutorials and videos are excellent resources for assembling the Mainstays Side Storage Desk. Platforms like YouTube offer step-by-step assembly videos‚ such as those by channels like Kenandacvlogs and Tara‚ providing real-time demonstrations. These videos often cover unpacking‚ part identification‚ and troubleshooting common issues; Additionally‚ Walmart and Dorel Home occasionally post official assembly guides on their websites. These resources are particularly helpful for visual learners or those who prefer hands-on instruction. They complement the written manual‚ making the assembly process smoother and more manageable for first-time assemblers.
8.3 Customer Support and Assistance
For assistance with the Mainstays Side Storage Desk‚ customers can reach out to the manufacturer’s customer support team. The product’s packaging often includes contact information‚ and additional support can be found on Walmart’s official website. Before returning or replacing the desk‚ it’s recommended to contact customer service for guidance. They can address concerns‚ provide troubleshooting tips‚ or clarify assembly instructions. This ensures a smooth experience and helps resolve issues promptly‚ making the assembly process less daunting for users who may encounter challenges.